
To connect your Canon printer to WiFi, turn on the printer, select WiFi setup from the control panel, choose your network, enter the password, and confirm. [Dial +1-801-878-6858 USA]
To connect your Canon printer to WiFi, turn it on and access the WiFi Setup or LAN settings from the printer’s control panel. Choose your wireless network, enter the correct password, and confirm the connection. Ensure the printer and your device are on the same network for smooth printing. [Dial +1-801-878-6858 USA]

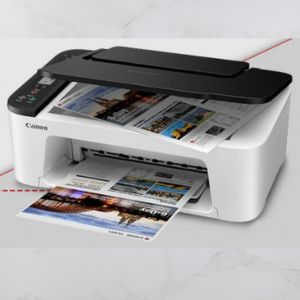
Why Connect Your Canon Printer to WiFi?
A wireless connection enables:
Printing from any device on the same network
Mobile and cloud printing support
Reduced cable clutter
Easier placement of your printer anywhere within WiFi range
Faster, hassle-free printing and scanning options
Things You’ll Need Before Connecting:
A Canon wireless printer model
Active WiFi network with SSID and password
A computer, laptop, or mobile device connected to the same WiFi network
Latest Canon printer drivers (available on Canon’s official website)
How to Connect Canon Printer to WiFi: Step-by-Step
Canon printers offer multiple methods for WiFi setup based on the model type. Below are the most common and effective options.
Method 1: Using Easy Wireless Connect (For Most Canon Models)
Power on your Canon printer.
Press the WiFi button on the printer or navigate to Network Settings on the display.
Select Easy Wireless Connect or LAN Settings > Wireless LAN Setup.
Choose Yes when prompted to connect to a network.
Download and open the Canon PRINT Inkjet/SELPHY app (for mobile) or Canon drivers on your computer.
Follow the on-screen instructions to select your WiFi network and enter the password.
Complete the setup process when prompted.
Method 2: Using Standard Wireless LAN Setup (With Control Panel)
Turn on your printer and access the Setup menu.
Go to Device Settings > LAN Settings > Wireless LAN Setup.
Choose Standard Setup.
Select your WiFi network from the list.
Enter your WiFi password using the control panel.
Confirm the connection.
Install printer drivers on your computer and follow connection instructions.
Method 3: Using WPS Push Button (If Router Supports It)
Turn on the printer and press the WiFi button until the WiFi lamp flashes.
Press and hold your router's WPS button within two minutes.
The WiFi lamp on the printer will stop flashing once connected.
Print a network configuration page to confirm connection if needed.
Method 4: Using Canon PRINT Inkjet/SELPHY App (Mobile Devices)
Download the Canon PRINT Inkjet/SELPHY app from your device's app store.
Open the app and select Add Printer.
Follow the in-app instructions to connect your printer to your WiFi network.
Once added, you can print directly from your smartphone or tablet.
Additional Tips for a Successful WiFi Connection:
Ensure your printer is within 10–15 feet of your WiFi router.
Enter the WiFi password carefully — it’s case-sensitive.
Restart your router and printer if the connection fails.
Make sure firewalls or antivirus software aren’t blocking the printer’s network connection.
Keep your printer’s firmware and drivers up to date.
FAQs: How to Connect Canon Printer to WiFi
1. How do I find my Canon printer’s WiFi settings?
Go to the Settings or LAN Settings menu from your printer’s control panel screen. There you’ll find options for Wireless LAN Setup and connection status.
2. Can I connect my Canon printer to multiple devices on WiFi?
Yes — once connected to your WiFi network, any device on the same network can use the printer, provided the Canon drivers or app are installed.
3. What should I do if my Canon printer won’t connect to WiFi?
Check your WiFi password, ensure both printer and device are on the same network, restart your router and printer, or reset the network settings on the printer and try reconnecting.
4. How do I reset my Canon printer’s network settings?
Go to Settings > Device Settings > Reset Settings > Reset Network Settings on your printer’s control panel. This clears previous configurations for a fresh WiFi setup.
5. Do I need to install Canon drivers for WiFi printing?
Yes — to print from a computer or laptop, download and install the latest drivers from the Canon support website to ensure proper wireless printing functionality.
6. Can I print from my smartphone via WiFi?
Yes — download the Canon PRINT Inkjet/SELPHY app for your device. Use it to connect your printer and send documents or photos to print wirelessly.
Conclusion
Connecting your Canon printer to WiFi is simple when you follow the correct steps based on your printer model. Whether using Easy Wireless Connect, Standard Setup, WPS, or the Canon PRINT Inkjet/SELPHY app, a stable WiFi connection allows seamless printing from computers and mobile devices. Remember to keep your printer firmware and drivers updated to avoid connectivity issues.
If you face repeated connection problems, reset your network settings or consult your printer’s user manual for model-specific instructions.